
 |
| Insignia NS-DXA1 Converter box Receives Digital TV broadcasts and converts to Analog for Older TV
INSIGNIA NS-DXA1 Digital to Analog Converter box and remote control 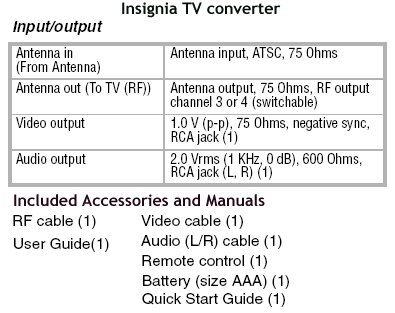 How to Hookup Digital Converter Box to Analog TV 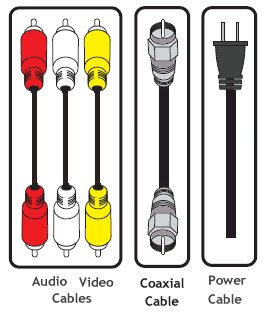 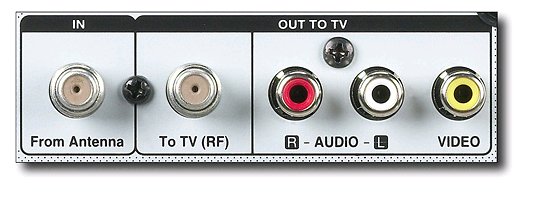 Digital to Analog TV converter box (REAR PANEL) Digital to Analog TV Connecting the digital TV converter box to your older analog TV involves plugging in the antenna cable to the converter box input jack for ANTENNA and connecting the converter box OUTPUT to your TV INPUT. If your TV is the type without Audio/Video input jacks and only has a VHF 75ohm RF input jack, then use a RG-59 or RG-6 coaxial cable to connect the TV to the converter box. This cable is the same as those used in homes with cable TV or satellite TV. You will get only MONO audio from a coaxial cable connection. If your TV is somewhat newer and has RCA audio/video input jacks (yellow, red, white) then you can get stereo sound if your TV has stereo sound capability. Use a yellow RCA cable for video and the two (red and white) RCA cables for audio. Use only the white RCA cable if your TV is not stereo sound capable. You will change channels on the converter box with the remote control. Your TV or VCR will remain on channel 3 or 4 (or Line). Hookup Diagram for TV with only an RF antenna input jack. Set TV to channel 3 or 4. 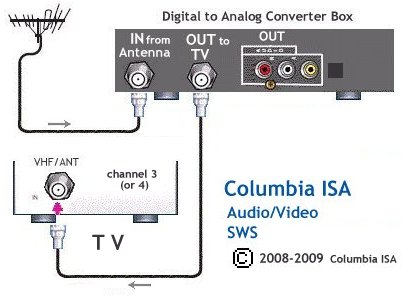 Hookup Diagram for TV with Audio/Video input jacks. Set TV to Line input. 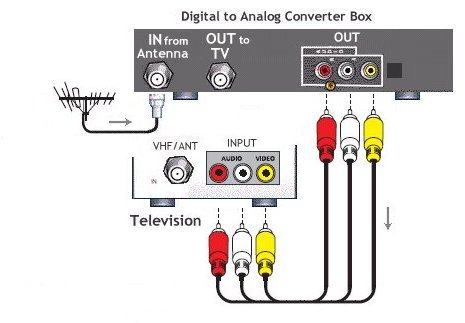 Hookup Diagram for VCR and TV. Set VCR to channel 3 or 4 and TV to channel 3 or 4. 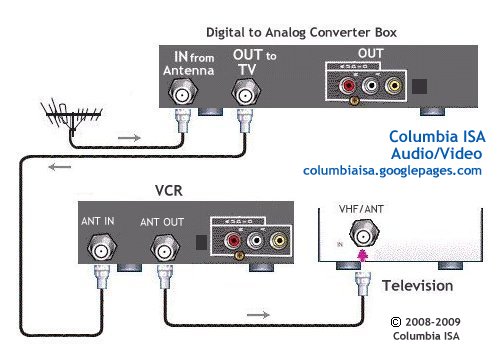 First time use - Insignia NS-DXA1 TV Converter The first time you power up the converter, you sequence thru some menus on-screen to setup your box. After connecting the cables and antenna to the converter box, plug it into AC power and press the POWER button on the INSIGNIA remote control (make sure the remote has a fresh battery inserted)
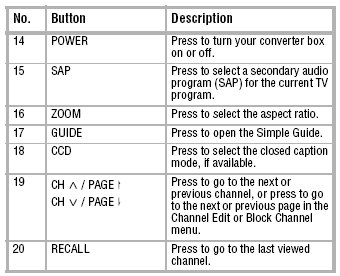 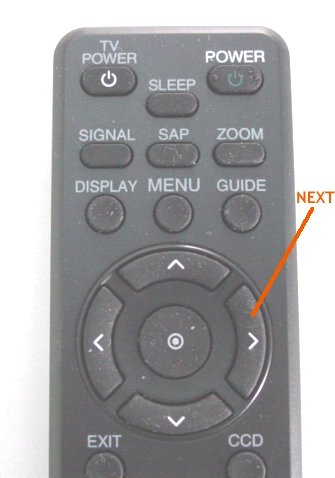 When you see NEXT >> on the screen, push this button on the remote to proceed. 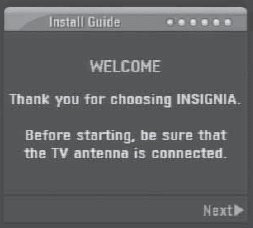 After powering up the converter box for the first time, you should see a WELCOME screen. If you do not, check your cable connections and your TV channel setting. Make sure you have a good antenna hookup. Next - you will be asked to select your LANGUAGE (English). Next - you will see a screen to select your ASPECT RATIO. Most will set to (4 x 3).  Next - to have the converter box search for your local TV channels, press the SELECT button on the remote (7) The converter will start looking for TV stations in your area and add any channels with a signal strong enough to show up. If a good, known TV channel is not added, do not be concerned because you can add them later using the on-screen MENU - EZ ADD.  Next - select your TIME ZONE Example - If you live in California skip to PACIFIC. For Texas, select CENTRAL. The time of day clock should be set from a signal received from a TV broadcast such as your local PBS station.  Congratulations, You are DONE! Press the SELECT button on the remote (7) to EXIT. To start watching TV use the converter remote control to select channels. (19) You should recognize your local TV stations and in addition you may see a little more program offerings. With Digital TV, your local stations have the option to send out multiple TV shows. PBS for example may broadcast a children's show on channel 9.1 and also be broadcasting a documentary on channel 9.2. This is called multi-casting and it allows the TV station to send several shows at once in lower video resolution. The sub-channels display as a smaller number next to the main channel. Some TV stations have up to 5 sub-channels with different programming.  Main TV channel (12) with sub-channel (1) NEXT PAGE >> More Options |