
|
|
RETRO GAMINGAtari 2600 Want to use that old Atari 2600 game on a modern TV? Well you can, using one of three connection methods. • VCR Head Cleaning • How to connect a VCR to a flat screen TV How to connect Atari 2600 console to modern TV Make all cable connections and then power ON all gear. 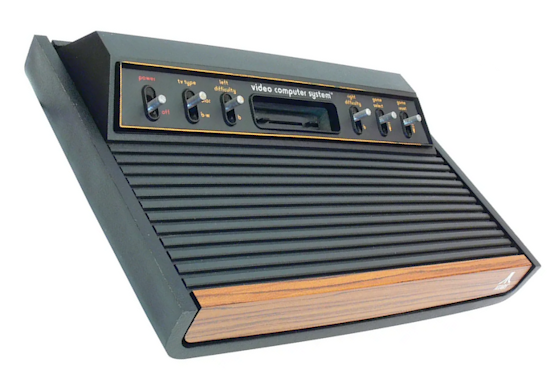  The Atari 2600 Game Console (1977) Atari 2600 Switches and Controls The system was originally released with all six switches on the front of the console, however, the console was redesigned in 1980 with only four of the switches on the front, and the others on the back. 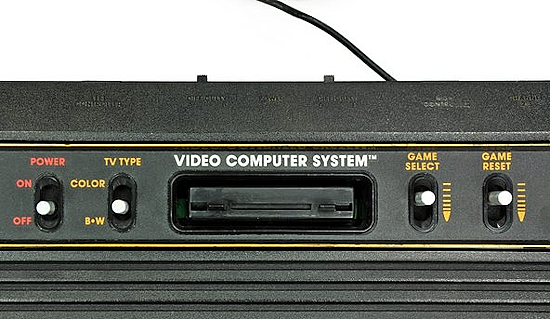 Starting from the top left lever: Power: Up (Power On) or Down (Power Off). Red is used for these letters while gold is used for all others. TV Type: Color (up) Black and White (down) Left Difficulty Level: A (up) B (down) This will often change some aspect of the game to make it easier. “A” is Advanced, and “B” is Beginner. Each game is different and these buttons could also be used for other functions in the game. Right Difficulty Level: A (up) B (down) – Same as the left, but for the right side player, player number two. This would allow one player to play on a different difficulty setting. Game Select: This is a spring loaded lever that is always in the Up position. You can press it down and it will return to its original position. Many Atari games have several variations available within the game. There could be many different scenarios you can toggle through. You can change many different aspects of the game. Game Reset: This switch is also spring loaded like the Game Select switch. It will often Restart the game when depressed. Atari 2600 TV Channel Select Switch: The Atari 2600 outputs its signal on either Analog (NTSC) Channel 2 or Channel 3. Use the channel selector switch on the back or bottom of your console to pick a channel, and make sure your TV is tuned to the corresponding analog frequency. 6-Switch Models (1977-1980) The TV channel 2/3 switch was a small recessed slider located on the underside of the console, accessible through a small hole in the bottom casing. The case (underneath) is inscribed with "Channel Select" next to the small slider switch inside the case. You can move it to the "A" or the "B" position with a small screwdriver tip. Some early 6-switch models had no channel select switch and were set to channel 3.  4-Switch Models (1980-onward) Atari moved the TV channel select switch to the rear panel of the console, along with the controller ports and power supply port. 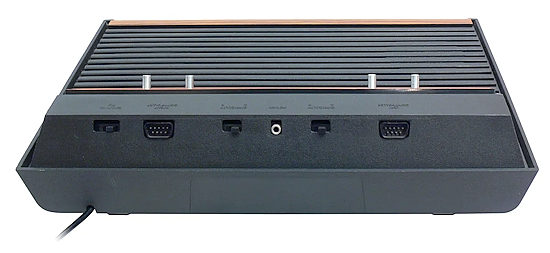  Atari 2600 TV connection The Atari 2600 natively outputs an RF (Radio Frequency) signal, which combines both video and audio into a single cable. Even though the game console uses an RCA-style plug, you cannot plug the Atari's output cable directly into a modern TV's standard yellow video jack as it will not work because the audio and video signals are combined. The RCA type connector plugs into a switch box RCA input which allows game use when the switch is in the game position but when watching TV programs, allows you to switch to the TV position. The switch box has RF (75 ohm) coax style output and also a twin lead (300 ohm) connection for the TV. This switch solves the issue of constantly disconnecting and connecting the cable to the TV when the game is not in use and TV viewing is desired. 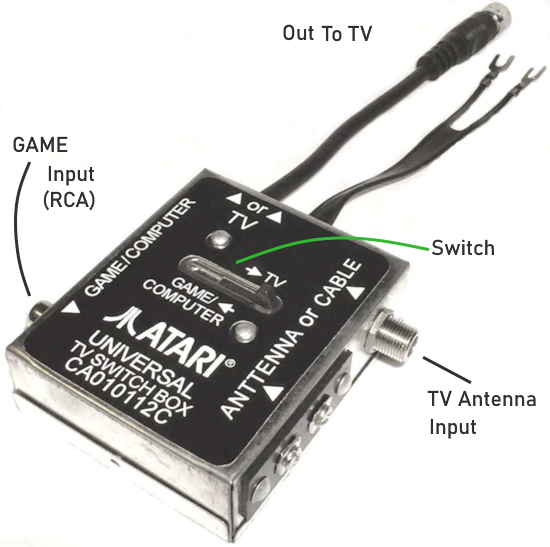 Without the switch box, you can connect directly to a TV (older analog TV is best) by using an adapter which takes the RCA plug and allows a coaxial RF connection to the TV RF antenna input port. 1. Connect to antenna RF TV input using RCA to coax adapter 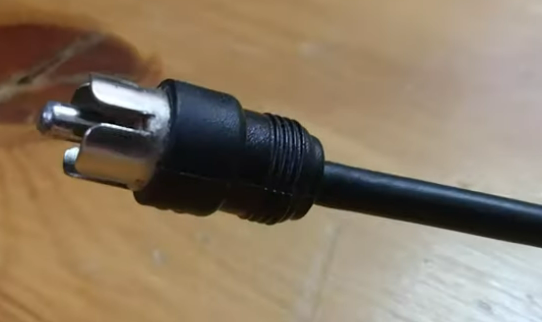 RCA cable from Atari 2600 console (RF) 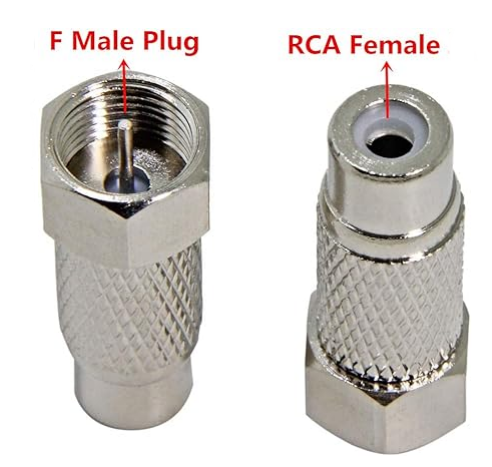 RCA to Coax Adapter 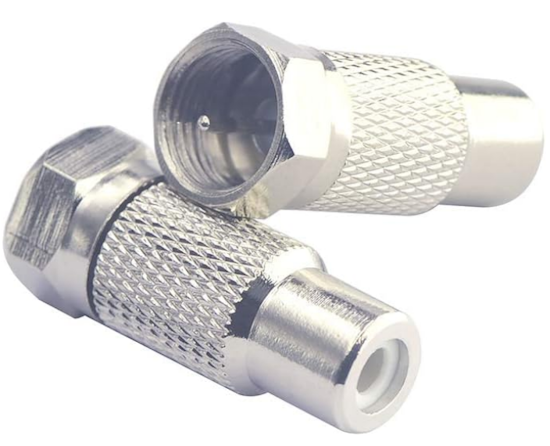 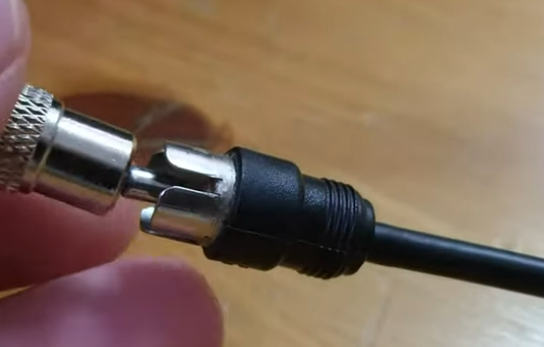 Plug adapter into RCA cable from game console 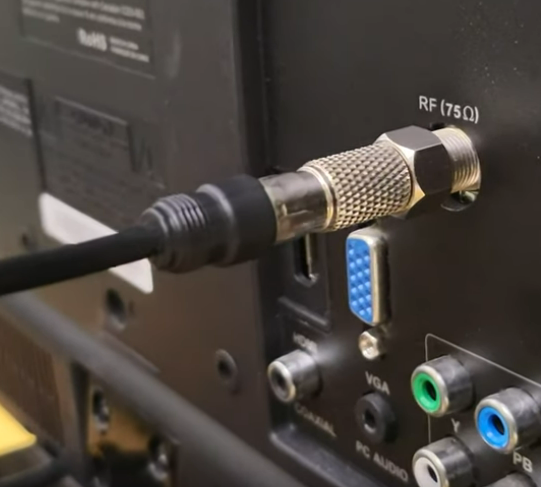 Plug into TV RF antenna input Select channel 2 or 3 or 4 on TV You may need to perform a channel scan on the TV with the game console active to pickup the NTSC signal. Even in 2026, modern flat screen smart TVs often have the old NTSC analog TV tuners built-in. Some smart TVs do not offer the analog tuner. The VCR Option 2. Use a VCR to connect if the TV has RCA inputs VCRs have a built-in RF Modulator which can take an RF input signal and output RCA composite video and audio. 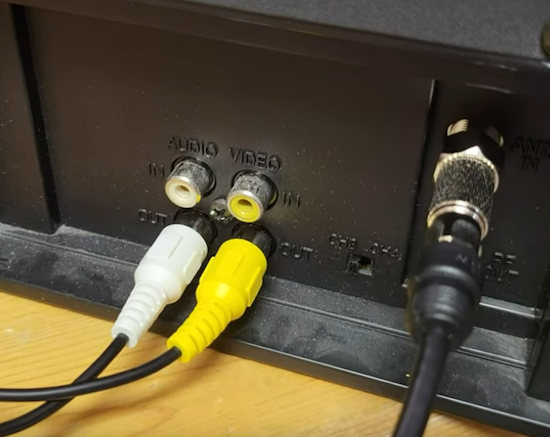 Connect game console cable with adapter in place to VCR RF input Connect RCA video and audio cables to VCR RCA outputs 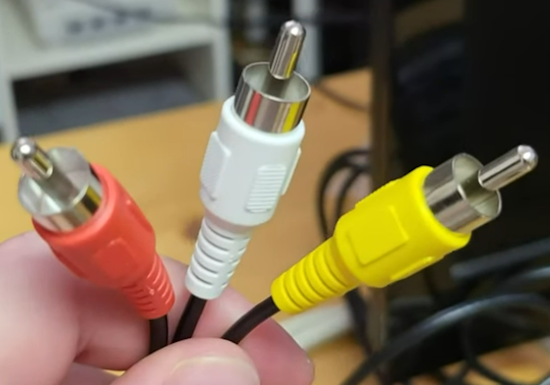 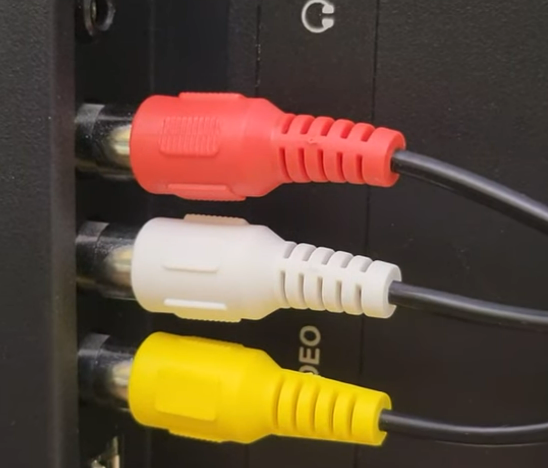 Connect RCA cables from VCR to TV RCA inputs (The red cable does not need to be connected as it is only for stereo sound) Select VIDEO 1, AV, composite source input or the like on the TV. 3. For a TV with only HDMI inputs: You need a RCA to HDMI adapter. Using the setup from number 2 above, but instead of connecting RCA cables to TV, plug the RCA cables from the VCR into the RCA to HDMI adapter and then plug an HDMI cable from the adapter to the TV HDMI input and select that HDMI input on the TV. 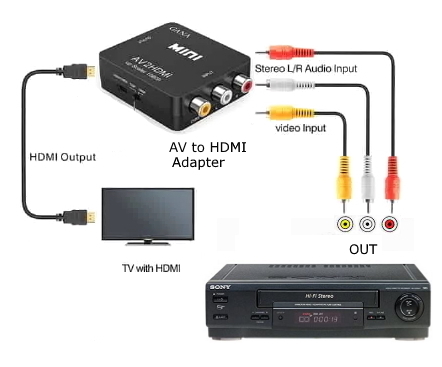 New Atari 2600 with HDMI connection to TV 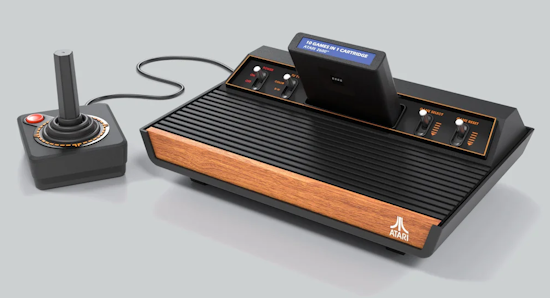 ATARI 2600+ The Atari 2600+ is an updated version of the iconic Atari 2600 and has been enhanced in the following ways: - Plays both Atari 2600 and 7800 game cartridges - HDMI output makes it easy to connect HDTV - Widescreen mode - Enlarged cartridge socket reduces sticking - Atari logo lights up when being played HDMI OUTPUT for modern TV Backward compatible with original games  Atari 2600+ Rear with HDMI port |
Columbia
ISA Audio Video
Empowering consumers through information.
columbiaisa@yahoo.com