|
|
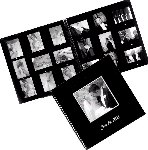 Photo Album |
 DVD |
| DVD players are the popular choice for family entertainment.
Movies on DVD can be very inexpensive and the players are available
everywhere for under $40 meaning almost anyone can afford to get one. DVD
is higher resolution than VHS tape or even analog broadcast TV. With
DVD recorders coming down in price, everyone will be able to
record DVDs of their own. What this means is you will literally be able to
create your own DVD. |
| Because DVD is so popular (almost everyone has a
player) and gives the viewer an excellent video and audio presentation,
why not use this media to create a personal tribute. A personal tribute is
a way to document someone's life so family members can review their
accomplishments and remember all the places and experiences that make up
the life of someone special.
Get out all those old black and white photos from decades ago and put them on DVD for preservation and also so your family can enjoy the old memories. If done carefully, you can put anything you can take a digital picture of on your DVD. This is because modern digital cameras can be used to copy the digital image over to a DVD you create on a DVD recorder. You can copy a variety of source material to your DVD including old photos, videos, music, voice or anything that you can input to the video or audio jacks of the DVD recorder. Does your special someone like a certain song? Why not put that song on your DVD as background music while your photos are being viewed. You can do this easily by playing a CD or audio cassette into your DVD recorder's audio input while you record the photo into the video input. You could also record a voice audio background to describe the video you're seeing. Many people do not realize that their digital camera can be used to copy digital images to a DVD. Digital cameras often come with a video output so you can view your digital pictures on your TV. Sony and Canon are two digital camera makers that provide a video output jack on the camera so you can hookup a RCA style cable (usually provided when you purchase the digital camera) to your TV line input jacks. Viewing your digital photos on the TV is the same process you'll use to record them on DVD. A stand-alone DVD recorder can record a DVD from the input source material you provide including digital images you take of your old photos or current images you've taken. Have any old video you took with your camcorder? Put it on DVD along with your photos for a more enjoyable DVD presentation. 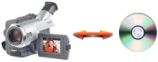 |
|
SOURCES of VIDEO and AUDIO |
|
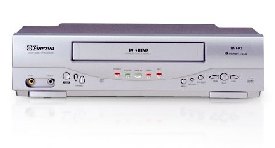 VCR |
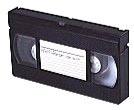 You may have old family VHS videotapes of events which you can include on the DVD. |
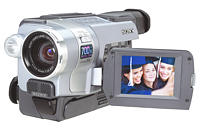
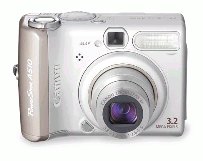 Digital Camera |
Current photos and also the photos you will take of your old
family photo shots from years past. You do not need anything more than a
1 megapixel digital camera.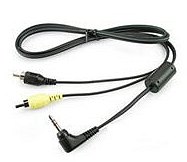 Cable - audio/video, to connect digital camera to DVD recorder or TV. |
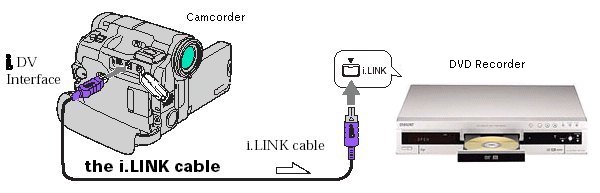
 Video Camcorder  |
You can transfer digital video from your
digital camcorder if your DVD recorder and camcorder can hookup with
a i-Link or Firewire cable. Many DVD recorders have this
capability.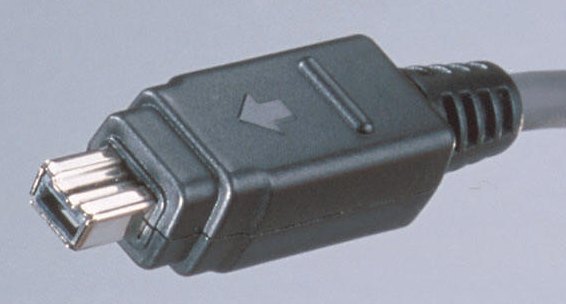 i-Link (Sony) cable connects camcorder to DVD recorder. i-LINK (DV) Camcorder Connection: The i-LINK (a.k.a. ?DV? and ?IEEE 1394?) interface allows you to transfer your DV (Digital Video) home movies to the DVD Recorder. Just connect the bi-directional DV input on the DVD?s front panel (DV IN) to your camcorder?s DV output. And if your movies were shot in analog format, inputs for composite video / S-video and Left-Right audio are available for copying them to DVD. |
 Analog Camcorder |
 Audio-Video cable connects camcorder to TV, VCR or DVD Recorder. (Analog) |
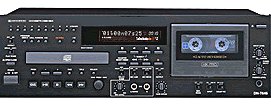 |
A CD player or audio cassette recorder can be used to supply background music or voice for your DVD presentation. Just connect the white and red analog audio cables from the player's output jacks to the proper audio input jacks on the DVD recorder. |
 Television |
  Remotes and blank DVD 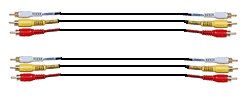 Cables |
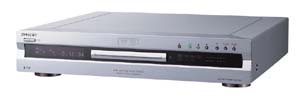 DVD Recorder |
Sony, Toshiba, Panasonic and others make DVD recorders. Cost is around $200. |
| Digital Camera - how many shots can I take? | |||
| Resolution | Quality | # images on 32MB memory | # images on 256MB card |
| 4M 2304 x 1728 |
Fine | 16 | 119 |
| Standard | 30 | 216 | |
| 4M (3:2 ratio) 2304 x 1536 |
Fine | 16 | 119 |
| Normal | 30 | 216 | |
| 3M 2048 x 1536 |
Fine | 20 | 148 |
| Normal | 37 | 264 | |
| 1M 1280 x 960 |
Fine | 50 | 357 |
| Normal | 93 | 649 | |
| VGA 640 x 480 |
Fine | 196 | 1428 |
| Normal | 491 | 3571 | |
Setup and
hookup
You need to connect the
Source Video OUT to the DVD recorder Video IN, and the DVD recorder Video OUT to
the TV Video IN.
For audio, connect the source audio OUT to the DVD
recorder audio IN and the DVD recorder audio OUT to the TV audio IN.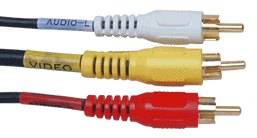
RCA cables for video (yellow) and audio (white and red)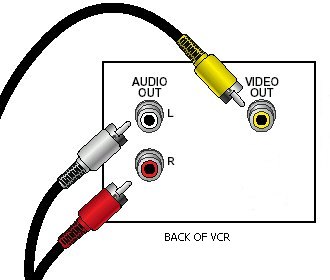
 Cable connection diagram showing the VCR, DVD recorder and TV hookup |
Digital Camera hookup with audio source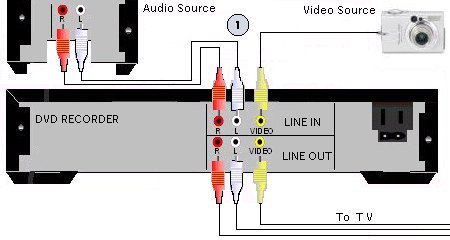 1. INPUT sources (video, audio) hookup to DVD recorder's LINE IN |
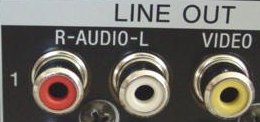
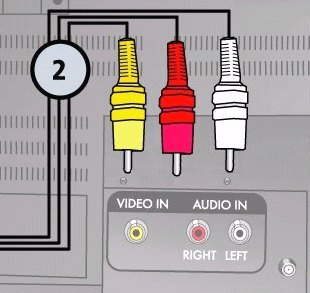 TV 2. Television cable hookup from DVD recorder 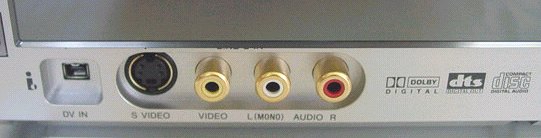 DVD recorder INPUT jacks: from left, i-Link digital video IN, S-Video, yellow composite video IN and left and right analog audio inputs (white and red). |
How to create your DVD 1. Gather your old photos together and put them in the sequence you want to present on the DVD. This can be a time-line sequence from birth to today of the person you are honoring. 2. Take digital images of each photo, in sequence, with your digital camera. This will require some effort and some skill if you want to have a quality DVD presentation. Because old photos are not all the same size, your editing and photographer skills come into play here. You need a flat one color background to place your photos on while you obtain the digital image of them. You'll also need good lighting. Some cameras have in-camera editing for cropping shots but if you have a personal computer, you might want to transfer your digital images over to the PC so you can edit them before copying to DVD. Remember that what you see on your digital camera will be what you see on the TV after you make your DVD and play it back. 3. Decide how you want to record any audio background such as music from a CD or voice. Remember to account for the time of the audio (playing time) with regard to the video presentation. Songs on CD last about 2 to 4 minutes. The audio may need a continuous loop in order to last long enough for all the video. Matching the audio to the video presentation may require some forethought and planning. 4. Connect input sources to DVD recorder and then DVD recorder to TV. 5. Press RECORD on the DVD recorder. 6. Press PLAY on your audio source such as a CD player. 7. While in review mode, press FORWARD on digital camera for each image. The time your image is on camera will be the time available to view when the DVD is played back. This does actually work. You will end up with a DVD which, if done correctly, will play on virtually any DVD player. You could mail out copies of the DVD you created to distant family members so they can enjoy it on their DVD player. Using the internet and a personal computer, you may be able to create the presentation on your website so anyone can view it online. You should have a remote control for the TV, and the DVD recorder. You need a blank recordable DVD with enough space to contain your content. You also need two sets of RCA audio/video cables (yellow, red, white). Each set of cables has a yellow video hookup and the red and white audio connections. Step by step: Step 1) You need to connect the yellow RCA cable from the video OUT jack to the DVD recorder video IN jack. These jacks can be labeled differently on various equipment. The main point is to get a video signal from the source output to the DVD recorder INPUT. (yellow to yellow) Step 2) You need to connect the red RCA cable from the audio OUT jack (R) to the DVD recorder audio IN jack (R). (red to red) Step 3) You need to connect the white RCA cable from the audio OUT jack (L) to the DVD recorder audio IN jack (L). (white to white) By making these 3 cable connections you have provided the path for video and audio to get to the DVD recorder. Step 4) Connect the DVD recorder to the TV. Using the set of RCA cables, connect the DVD recorder video OUT jack to the TV video IN jack (yellow to yellow) Step 5) Connect the DVD recorder audio OUT jack (R) to the TV audio IN jack (R) (red to red) Step 6) Connect the DVD recorder audio OUT jack (L) to the TV audio IN jack (L) (white to white) By making these 3 cable connections you have provided the path for video and audio to get from the DVD recorder to the Television so you can see the process. Step 7) Plug in the DVD recorder and the TV and power each device ON. Step 8) Make sure that the DVD recorder has been configured with an initial or basic setup so that you can perform the required functions of channel selection and other primary operations. Step 9) Ready the source material. Step 10) Using the TV remote control, you must select the TV INPUT mode which corresponds with the set of INPUT jacks you used to connect the DVD recorder. If your TV has multiple INPUT jacks, sequence thru by pressing the button on the TV remote which selects the various INPUTS. You know you have the correct setting when you see the DVD recorder's output on the TV screen. Step 11) Insert a blank recordable DVD into the DVD recorder.  Step 12) If you need to format the blank DVD, do so by indicating the format you want (using the DVD remote control) and waiting for the disc to be formatted. Step 13) Using the remote control for the DVD recorder, you must select the INPUT setting which corresponds with the set of INPUT jacks you used to connect the source to the DVD recorder. You know you have the correct setting when you see the source output on the TV screen. (this may just be a blue screen until you press PLAY or select review mode on the digital camera) Step 14) Position the source input to the beginning of the point where you want to start copying. You can monitor the source content on the TV screen if you have all the INPUT settings properly selected. Step 15) Copy source material to DVD. Optional: Select video quality mode using the DVD recorder remote control. SP mode should give you 2 hours of video but some people prefer longer recording times at the sacrifice of some video quality. Six hours of DVD record time is possible with a setting of SLP etc. Press RECORD on the DVD remote. Monitor the copying process on the TV. Step 16) When finished, press STOP on the DVD remote. The DVD recorder will write data to the disc. (this may take a short time) You should now have the video and audio from your input sources copied on a DVD. To check, press PLAY on the DVD recorder. You may see a MENU which includes the segment you just recorded. If required, select the last recording and PLAY it. Eject the DVD when finished playing. Note: Playing your DVD on the DVD recorder it was recorded on most likely does not require finalization, however if the DVD is to be played on another DVD player, it may have to be finalized. Hopefully you have had success creating your DVD. Now it is time to enjoy your work! If you have had problems with this process, all is not lost. There are video services which will do all the work for you (for a price). All you have to do is give them all your photos and other source materials and they will create the DVD for you. They can even transfer old movie film to DVD. Check on the internet for DVD video services or check the yellow pages for your area. You could even mail your source material out to them if nothing locally is available. |
| Home : DVD Intro : DVD Recorders : Cable connections : Copy VHS to VHS |
| dvd recorder basics : Operation of dvd recorders : dvd formats |
| DVD recorders introduction |
| DVD Audio only recording |