|
|
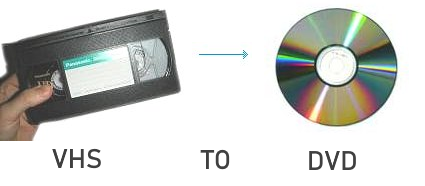
To copy a VHS videotape to a DVD, you can use many different methods, however one of the most straightforward approaches is to use equipment you may already have or can get on E-Bay, Craigslist, Amazon or your local thrift shop. Always be sure to test any used recorders or know testing has been done on older units because over time the record function may have been damaged or some components in the unit may have failed while the play function still works. Method 1) Using a stand-alone DVD recorder along with a VHS VCR and TV will work for most people and the process is relatively simple. Connect the VCR outputs (yellow, white, red) to the DVD recorder inputs (yellow, white, red) matching the colors and then connect the DVD recorder outputs (yellow, white, red) to the TV inputs (yellow, white, red) matching the colors. 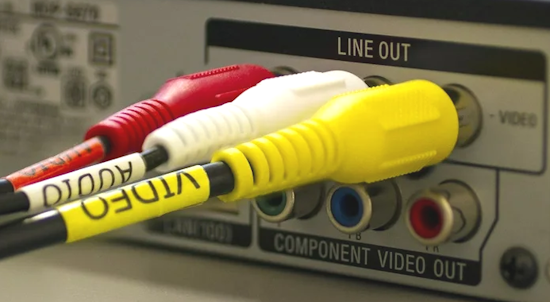 Power ON all three devices. Select on the TV, the source input where you connected the DVD recorder. This is usually called AV or Composite. Cycle through the TV inputs to discover the correct selection. Position the VHS tape in the VCR to your starting area you want to record from. Play the VHS tape in the VCR (non-commercial tape) and record onto a recordable DVD in the DVD recorder. Get some blank recordable DVDs in a format you can use. 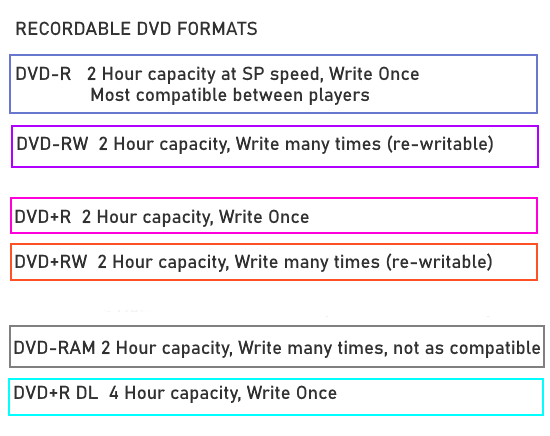 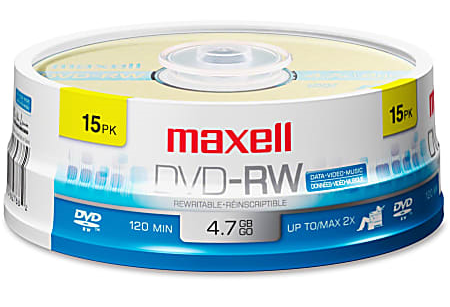 Method 2) Another alternative is a Combo VCR/DVD recorder. These units can dub or copy vhs to dvd in a single device. Look for "ONE-TOUCH DUBBING". Be sure to use a unit with a DVD recorder. Some units are DVD play only. 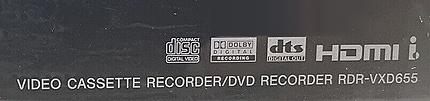  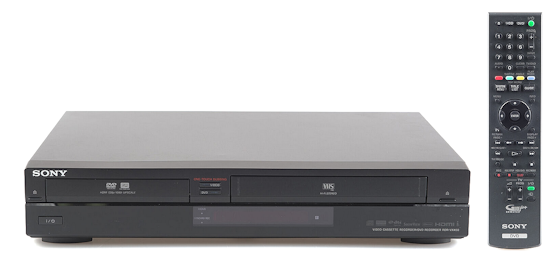 Sony combo DVD VCR unit with remote - DVD on the left, VCR on the right. Method 3) Using a service: another method is to use a commercial service to copy VHS to DVD, however this can be costly and you must give your tapes to unknown persons. Suppose your tapes are lost or stolen or even worse, erased or damaged by strangers. Your memories are valuable to you and this risk may be too great. If you do decide to use a service, Walmart is one provider that can do the job for you. Walmart media transfer Method 4) If you have a digital camcorder you may be able to use it to transfer VHS tapes to a computer. Or if your computer has a video capture card with RCA inputs and the proper capture program, you can connect your VCR that way. Method 5) You can also buy a device to connect your VCR to your computer and using software, copy VHS tapes to your computer. Then upload to internet or burn a DVD. See below. The following list is what you need to copy a VHS tape to a DVD using a DVD recorder.
Video Capture from VCR to computer using USB connector to computer and RCA cables to VCR. Also hooks up to TIVO or DVR. Capture old VHS, Beta, 8mm or camcorder tapes and convert them to DVD or other digital formats. Convert and watch your captured video on portable devices, and share your videos with friends and family on Facebook and YouTube. Bonus: Record audio from your cassettes and LP records to create WMA files or audio CDs. Capture analog video for your Mac or PC, iPad and iPhone Transfer video from a VCR or other analog video source to your Mac or PC. Easy-to-use software guides you through every step Copying your videos to a mp4 file on your computer will allow you to preserve the video, back it up to the cloud, share with family on internet sites such as YouTube and then also copy to multiple DVDs whenever you wish. • ClearClick Video to Digital Converter 2.0 (Second Generation) - Record Video from VCR's, VHS Tapes, AV, RCA 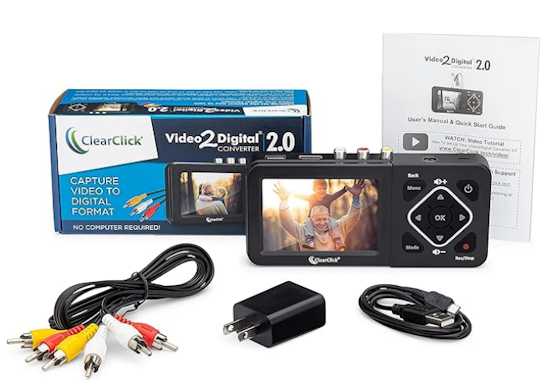 The above device will allow you to copy VHS tapes from a VCR to a USB flash drive. Then put the USB drive into your computer and copy the files for backup, sharing on internet or viewing on computer. You even get a small screen to watch the video as it copies to flash drive. Also, you can copy to a SD card if your computer has this input. Hookup a camcorder and copy 8mm, miniDV or VHS-C tapes. • Camcorder to PC video capture with Windows What you need: VHS to DVD  VCR 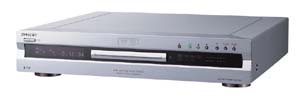 DVD Recorder 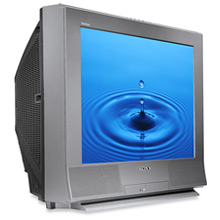 Television 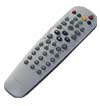 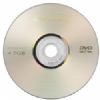 Remotes and blank DVD 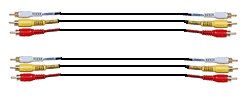 Cables
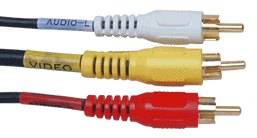
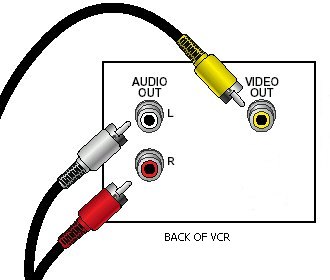
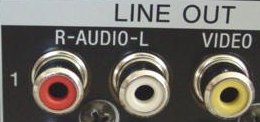
 Cable connection diagram showing the VCR, DVD recorder and TV hookup for copying VHS to DVD Follow this process to copy VHS to DVD This is a general procedure which should work in most situations. You may have a component which varies from the standard, in which case you should consult your owner's manual after learning the standard process. First let's define the environment: You have a VHS VCR, a DVD recorder and a TV to monitor the copy operation. You should have a remote control for the TV, the VCR and the DVD recorder. You need a blank recordable DVD with enough space to contain your VHS tape content. You also need two sets of RCA audio/video cables (yellow, red, white). One set of 3 cables to connect the VCR to the DVD recorder and another set to connect the DVD recorder to the TV. Each set of cables has a yellow video connection and the red and white audio connections. Step 1) You need to connect the yellow RCA cable from the VCR video OUT jack to the DVD recorder video IN jack. These jacks can be labeled differently on various equipment. The main point is to get a video signal from the VCR output to the DVD recorder INPUT. (yellow to yellow) Step 2) You need to connect the red RCA cable from the VCR audio OUT jack (R) to the DVD recorder audio IN jack (R). (red to red) Step 3) You need to connect the white RCA cable from the VCR audio OUT jack (L) to the DVD recorder audio IN jack (L). (white to white) By making these 3 cable connections you have provided the path for video and audio to get from the VCR to the DVD recorder. Note: If your VCR only has a white audio jack and no red audio jack, just connect the white, you do not need a red connection. (the red audio connection gives you stereo sound) 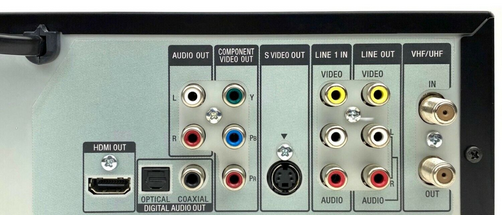 REAR of a recorder/playback unit showing the yellow video and white and red audio RCA inputs and outputs. LINE 1 IN connects input signals to record and LINE OUT connects playback signals to TV. HDMI OUT and COMPONENT VIDEO OUT are optional DVD outputs if your TV has these inputs available. Some older units will not have HDMI output. Step 4) Connect the DVD recorder to the TV. Using the second set of RCA cables, connect the DVD recorder video OUT jack to the TV video IN jack (yellow to yellow) Step 5) Connect the DVD recorder audio OUT jack (R) to the TV audio IN jack (R) (red to red) Step 6) Connect the DVD recorder audio OUT jack (L) to the TV audio IN jack (L) (white to white) By making these 3 cable connections you have provided the path for video and audio to get from the DVD recorder to the TV. Step 7) Plug in the VCR, the DVD recorder and the TV and power each device ON. Step 8) Make sure that the VCR and the DVD recorder have been configured with an initial or basic setup so that you can perform the required functions of channel selection and other primary operations. Step 9) Insert the VHS videotape you are going to copy into the VCR. Step 10) Using the TV remote control, you must select the TV INPUT mode which corresponds with the set of INPUT jacks you used to connect the DVD recorder. If your TV has multiple INPUT jacks, sequence thru by pressing the button on the TV remote which selects the various INPUTS. You know you have the correct setting when you see the DVD recorder's output on the TV screen. Step 11) Insert a compatible blank recordable DVD into the DVD recorder. Note: There are different types of recordable DVD and it can make a big difference which type you record on. There are five types of disc. DVD -R, DVD -RW, DVD +RW, DVD +R and DVD-RAM. The write-once type (-R and +R) means the recorded area on the disc cannot be recorded over again. The re-writable type (-RW and +RW) can be recorded over again and again. Check your DVD recorder for disc type compatibility and also check any DVD player you may use for disc type compatibility before selecting a recordable DVD type. Step 12) If you need to format the blank DVD, do so by indicating the format you want (using the DVD remote control) and waiting for the disc to be formatted. Step 13) Using the remote control for the DVD recorder, you must select the INPUT setting which corresponds with the set of INPUT jacks you used to connect the VCR to the DVD recorder. You know you have the correct setting when you see the VCR's output on the TV screen. (this may just be a blue screen until you press PLAY on the VCR) Step 14) Position the VHS tape to the beginning of the point where you want to start copying. Press REWIND and PLAY until you have the tape positioned. You can monitor the tape content on the TV screen if you have all the INPUT settings properly selected. Step 15) Copy VHS tape to DVD. Optional: Select video quality mode using the DVD recorder remote control. SP mode should give you 2 hours of video but some people prefer longer recording times at the sacrifice of some video quality. Six hours is possible with a setting of SLP etc. Press RECORD on the DVD remote and press PLAY on the VCR remote. Monitor the copying process on the TV. Step 16) When finished, press STOP on the DVD remote and press STOP on the VCR remote. The DVD recorder will write data to the disc. (this may take a short time) You should now have the video and audio from your VHS tape copied on a DVD. To check, press PLAY on the DVD recorder. You may see a MENU which includes the segment you just recorded. If required, select the last recording and PLAY it. Eject the DVD when finished playing. Note: Playing your DVD on the DVD recorder it was recorded on most likely does not require finalization, however if the DVD is to be played on another DVD player, it may have to be finalized. Hopefully you have had success creating your DVD. NOTE: You should be able to copy any VHS, 8mm, or MiniDV tape that you recorded yourself in the first place like your own home videos of the kids. Trying to copy a commercial VHS tape like a Hollywood movie for example often can cause a problem. Commercial recordings usually have copy protection schemes built-in. "The industry" has gone to great lengths to prevent you from copying their creations. • YouTube Video: How to record VHS to DVD Copy your VHS tapes to DVD using your laptop and capture software 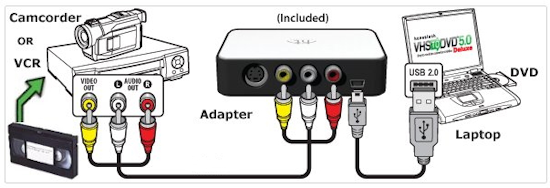 If you have a laptop computer, it probably has a DVD burner. This means you can create DVDs from your videos using capture software and a small video converter which plugs into your laptop's USB port. You can use different software to capture your video and there are several capture devices available which hookup to the USB port on a laptop. If your laptop shows DVD-RW or says recordable on the drive, it is most likely a DVD burner drive and can record on blank DVDs. See the Honestech VHS to DVD 5.0 product from Amazon.com • YouTube video on the VHS to DVD Save your home videos and photos onto Blu-ray Disc media without a PC. From video tapes to digital images, the VBD-MA1 preserves your memories quickly and easily. Record high-definition AVCHD video from your camera or camcorder. Built-in slots accept multiple memory cards. Preview videos and photos on the 2.7-inch LCD screen. Sony VBDMA1 DVDirect MA1 Multi-Function Blu-ray Disc/DVD Recorder
• Combo VCR/DVD recorders Guide - VHS to DVD in a single unit • See over 100 hookup diagrams • DVD Players review and guide Columbia ISA Audio/Video columbiaisa@yahoo.com Empowering consumers thru information. DVD Intro : Cable connections : Copy VHS to VHS |