|
|
HomeTV Setup and Installation Smart TV Setup Guide This TV guide will walk you through the major steps of your TV installation. How to Set Up a Smart TV Wondering how to set up a smart TV? Here are the main steps you have to take in order to setup a smart TV:  Unboxing: Open the TV box and lift the TV out. For larger TVs, this could be a two person job. Set the TV face down on a soft flat surface. Remove any protective coverings except leave the screen protection in place for now. Find the TV stand or legs and if not wall mounting, get a screwdriver and attach the stand to the TV using the provided screws.  Some TVs have a pedestal stand while others use two legs. 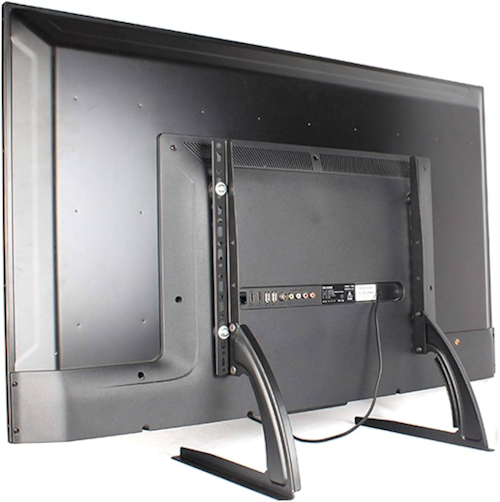 Choose the Perfect location for your TV Wall mount or Stand - using the stand is simple while wall mounting is more complex. You may want to attach the stand first and wall mount later, after the TV is checked and setup for the first time. Lift TV upright and place on a hard flat surface on the stand with screen facing you. Remove any screen protector. Attach the TV power cord to the TV rear and plug other end of the cord into a working power outlet and power the TV ON using the TV remote.  Insert good batteries into TV remote control or be sure remote is fully charged.  TV Standard Remote  TV Smart Remote Every TV has different first steps. Some will ask for your preferred Language, others will ask if you want to use the TV remote or your phone. Follow the process, selecting your choices with the TV remote or phone.  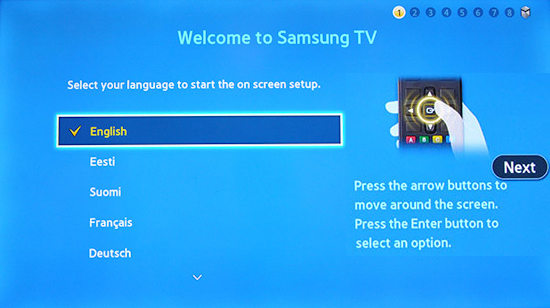 Connect your TV to the internet 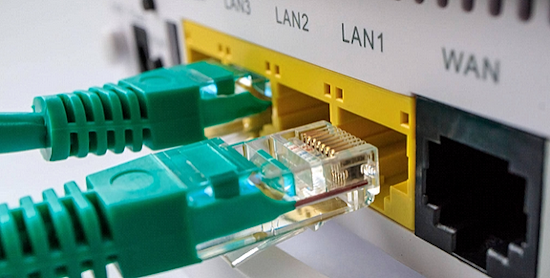 One of the common first procedures for TV setup is to connect to the internet. Connect an Ethernet cable from TV LAN port to your router LAN port or use Wi-Fi. When asked, choose your home network name from the list and enter your Wi-Fi password if going wireless to connect. 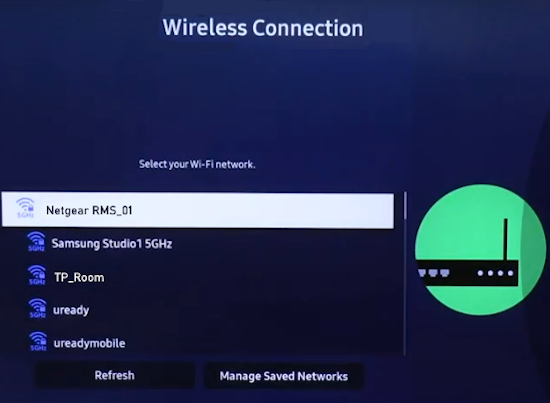  Update TV software Next the Update TV software process may occur if your TV is not up to date with the latest code. This may take 10 mins. After completed, the TV will restart with the new code installed. To update without internet access, you can usually use a USB thumb drive and download to the drive, then insert USB drive into TV's USB port to install the code. • Update TV Software Some TVs will ask you to create a user account with a password. You can skip this and do it later if preferred or you can create an account. You can also sign-in to your existing account online if you have one using your phone. Voice commands - Choose your assistant or skip for now. Navigate the TV’s on-screen set up process and its settings Master the device’s interface and home screen Install your apps Every TV maker has their app store where you can download apps which will run on that TV. Navigate to the APP icon and search for the app you want to get. Remember that many apps are not free. You may need to sign up and pay before access is granted. Connect External devices Streaming media players, cable TV set-top-box, Blu-ray/DVD player, game console all connect with HDMI cables to the TV HDMI inputs on the rear panel or side panel of the smart TV. 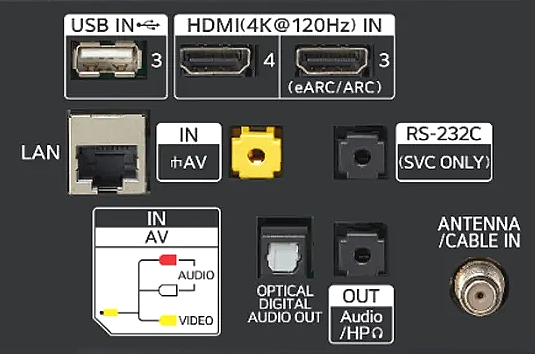 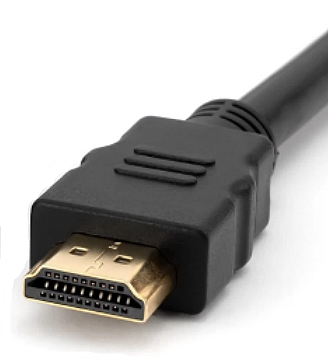 HDMI Cable Bluray/DVD player, Satellite TV, game consoles, streaming devices can be connected with HDMI cables to the TV HDMI inputs. A soundbar can be connected to the TV HDMI eARC/ARC port for better sound.  How to Select Samsung TV Input Source Device Uisng the Smart Remote, press the Home button. MENU/SOURCE, Connected devices/External device Using the Standard remote, Press the Source button on the remote control to cycle through the Source Inputs. Choose the source device based on the input connection. Connect your Antenna A VHF/UHF TV antenna connection using RG-6 coaxial cable will allow local broadcast channels to be received by the TV tuner. Use the round silver threaded port on the TV marked ANT/Cable. Be sure to perform a channel scan to save local TV channels in the TV memory.   Go through the smart features Troubleshoot common issues Fine-tune your TV’s settings Picture, Sound and other settings you may want to get setup using the TV menus will allow you to enjoy the content you want. Every TV has different menu options but generally navigate to SETTINGS and from there, drill down to sub-menus to find the items you want to change. 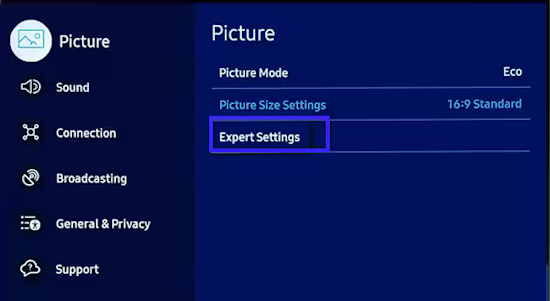   How to setup Voice Control on Samsung Smart TV To use the voice control, long press, hold the microphone button on the TV remote and speak your command such as "Open YouTube". Then release the button. You must have a Samsung account and internet access. Wake up Bixby voice control by saying "Hi Bixby". Set up Bixby Voice Control Once Bixby is set up, you can ask it to turn on the TV, check the weather, or play a movie. Navigate to Settings on your TV, select General, and then select Voice. Select Voice assistant, and then choose Bixby. Select OK to use Bixby as your voice assistant. You can select Bixby Voice Settings to choose your language, voice response, and sound feedback. Next, press the microphone button on your TV's remote and say “Hi, Bixby” to begin giving commands. To adjust Bixby’s options, navigate back to Settings, select General, and then select Voice. The Voice Wake-Up function will allow you to turn on the TV using your voice, and Voice Hint will help Bixby recognize your voice clearly. You can select Bixby Voice Settings to change the language, sensitivity, sound, and feedback preferences.   TV Connections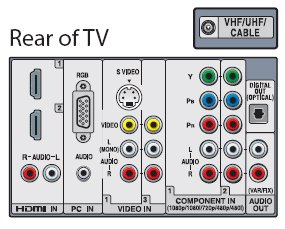 You are familiar with standard connections to your TV, such as from your VCR, DVD player or satellite decoder. These include RF coaxial cable connection, composite video (RCA Type), S-Video and Component Video. Now with HDTV you will need to become familiar with some new digital connections. The digital connections have pros and cons and your HDTV or decoder/tuner box may not support them all. You should check the manual or the rear of your HDTV set or tuner box to determine what connections are supported. Many of the digital connections involve copy protection capability to prevent content recording. This copy protection could be used to prevent recording of Pay per view channels for example.
VGA- VGA connections, also known as D-Sub-15,
have been around for many years in the computer world. The 15 pin VGA
connector is used to link a personal computer with its monitor. The analog
VGA connection is usually used on HDTV tuners to support a computer
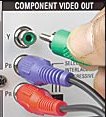
monitor. Component Video- The component video connection
is the most common way to connect HDTV set top boxes and HDTV cable or
satellite decoders to HDTVs. Component video separates the video signal
into 3 distinct streams (red, green and blue), in which the video signal
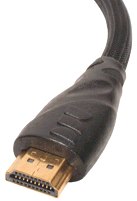
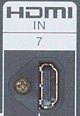
is carried via three individual cables using RCA type jack connections. HDMI- High Definition Multimedia Interface
(HDMI) is the newest connector and is the successor to DVI. HDMI
began appearing on new HDTV sets in late 2003. HDMI, unlike DVI, which can
only pass video, is capable of passing both video and multi channel audio
(up to 8 channels).
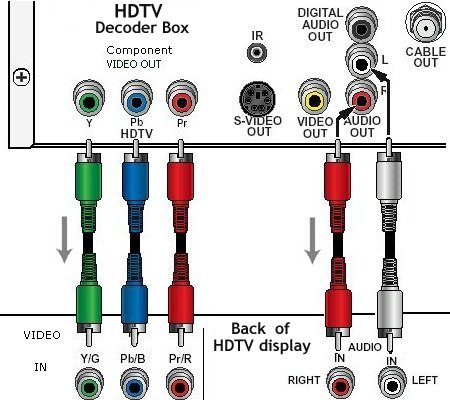
HDTV Connections
The most common way to connect your HDTV cable TV tuner box or HDTV satellite decoder directly to your HDTV is to use a component video connection. If both your set top box and HDTV support HDMI, you can use a HDMI cable connection instead. HDMI keeps the whole connection digital where component video has to convert analog. Some people opt to connect their multimedia devices to their television
through their audio/video receiver so as to allow the receiver to switch
between video sources. For high definition applications however, you will
need to consult your A/V receivers documentation to see if it supports
high bandwidth video connections. Your manual should refer to this as
"wide-bandwidth", "HDTV compatible" or "wideband". • See over 100 hook up diagrams Audio ConsiderationsYou should also consider your systems audio capability. Since many HDTV and other DTV formats broadcast audio in Dolby Digital 5.1 (AC-3) or other 5.1 digital surround formats (DTS), you may wish to invest in an external A/V receiver which is capable of decoding this audio format. At the very least, you will want a receiver or television capable of decoding Dolby Pro-logic, otherwise you will be missing out on the outstanding sound fidelity that HDTV can deliver. Most quality mid range to high end A/V receivers support both Dolby Digital 5.1 as well as DTS and Dolby Pro-logic. Having all 3 standards is important so you can receive full audio benefit with other media devices such as DVD's, which sometimes use DTS instead of Dolby Digital. True Surround Sound requires 3 front loudspeakers and 2 or 3 rear loudspeakers as well as a subwoofer for bass. Most televisions only have 2 speakers at best so you'll need to invest in an audio system for added sound quality.
HDTV SetupNow that you are familiar with the basics of high definition, you are
ready to begin setting up your system. Your first step is to determine
from your televisions manual if your set's native input is 720
progressive, 1080 interlaced or 1080 progressive. Most HDTV sets come with a number of audio/video inputs allowing you to connect your HDTV decoder in addition to your DVD player, satellite system and other media devices. The television's video/input button allows you to toggle between different sources.
HDTV Recording ConsiderationsRecording high definition broadcasts is also an important consideration, since it cannot be recorded via conventional means such as VCR or regular personal video recorder without loss of the HD picture quality. Many HD cable TV decoder set-top-boxes have the capability to record High
Definition broadcasts. Many satellite TV decoders also have the capability to
do this. More and more manufacturers will be introducing equipment for
this purpose as HDTV broadcasts become commonplace. Another method of recording HDTV broadcasts is over a FireWire/IEEE 1394/iLink connection if your Set top box supports it. In order to record over the FireWire connection, you will also need a digital VCR (D-VHS), which can also playback broadcasts over the connection. Digital VCR's are also capable of playing and recording analog sources such as regular VHS tapes. If you lack HDTV capable DVR or DVHS/FireWire connection, you can also
record a down-converted version of the HDTV broadcast over the analog
S-Video/composite audio/video connections. This would allow you to make
use of your analog VCR or Tivo or other DVR device. The broadcast will be
in either Enhanced Definition Television format (EDTV), or the Standard
Definition format (SDTV), which is limited to 480 lines of resolution,
delivering near DVD quality. |